
What is Cabinet Glazing?
Cabinet glazing is the process of adding a second color to your cabinets. This color helps accentuate the architectural details such as corners and molding. Similar to staining your cabinets, cabinet glazing is a great way to transform your kitchen or bathroom without investing in new cabinetry.
Glaze comes in two formulas, oil-based and water-based. Choosing the right glaze will be dependent on if your cabinets are painted or stained. For painted cabinets, we recommend a water-based glaze, and for stained cabinets, we recommend oil-based. It’s important to note that oil-based glazes have a slower drying time, which makes them typically easier to work with.
From our experience at Cabinets Direct, glazing works best when your cabinets have been freshly painted or stained and have had time to dry completely. Glazing works best with oil-based paint, specifically with an eggshell or satin finish. Chalk paint that is unsealed will be more difficult to work with.
Is it Still Trending to Use Cabinet Glaze in 2024?
The short answer is yes, but the look of glazing has shifted over the years. Distressed, antique cabinetry was very popular a decade ago when it seemed like every kitchen embraced the look. Now, more natural and earthy looks are more in style, along with matte or one-note finishes. But glazing is still highly regarded as the best way to add depth, tone, and uniqueness to your cabinetry. If you are not leaning towards an ultra-modern space, or you have mixed cabinets, a select piece may benefit from a glazing application. Subtle hues are also a developing trend and can add a classy, timeless look. Finally, for home owners that want to refresh a cabinet space but aren’t ready for all new cabinets may want to employ glazing to bring new life into their aging kitchen via this technique. A custom countertop may also suddenly fit into this refreshed part of the now if the cabinets take on some updated, matching tones simply by accentuating with glaze.
What Are Some Cabinet Glaze Colors?
While there are a wide variety of colors to choose from, many homeowners choose a dark glaze on stained cabinets or a white glaze on light cabinets for a more rustic, subdued look. For a more dramatic pop, some homeowners choose a dark glaze on light cabinets, as this provides extra shadows to really accentuate the details.
No matter what color you choose, you can seek comfort knowing that there’s nothing to worry about when working with glaze. While we suggest to start subtle and keep adding until you are satisfied, if you do not like what you have done, simply wipe the glaze away with paint thinner and try again!
How To Glaze Your Cabinets
Looking to elevate the overall look and feel of your home while still on a budget? Follow our steps below to successfully glaze your cabinets!
1. Remove Hardware and Set Up Your Space
The first thing you are going to want to do is to set up your space to glaze. Remove all cabinet doors, drawers, hardware, knobs, and handles. In addition, to ensure the glaze does not end up on your countertops, backsplash, flooring, or other surface, be sure to cover the area completely with drop cloths and painter’s tape.
2. Clean Your Cabinets
Glaze works best when the cabinets are nice and clean. A degreasing cleaner will help remove any residue that may have built up on your cabinets from everyday wear and tear. Once you have finished with the cleaner, we recommend applying deglosser with a rag. The deglosser acts like liquid sandpaper and will make sure all the excess dirt is removed.
3. Paint Your Cabinets (if needed)
As we stated earlier, glaze usually works best when the cabinets are newly painted or stained. If your cabinets require a paint or stain job, be sure to allow the cabinet doors, drawers, and cabinets to dry completely before applying the glaze. This will take at least 24 hours, but may take longer depending on the humidity. If your cabinets do not need to be painted, skip ahead to step 4.
4. Prepare Your Glaze
For those who have purchased a pre-mixed glaze, all you need to do to prepare your glaze is to simply mix it with a paint stirrer after opening. For those looking for a more custom look, you can create your own glaze shade by combining a glazing product with latex paint. Four parts glaze to one part paint is a safe starting point, but exact measurements will be dependent on manufacturing instructions and your personal preference.
5. Apply The Glaze
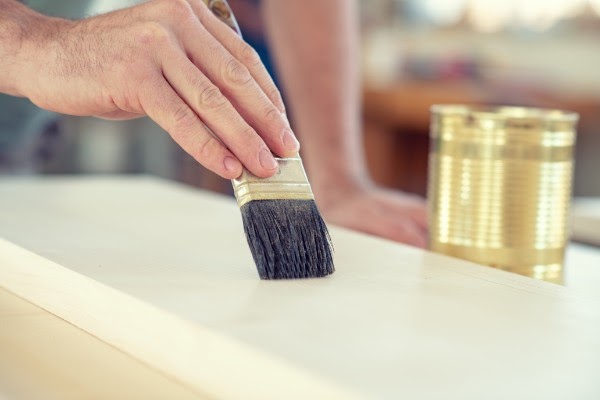
Now it’s time to apply your glaze! You can use a rag, natural bristle paint brush, or foam brush to apply it. Liberally apply a layer of glaze over one of the cabinets, using a circular or straight motion. The glaze is going to look messy and darker than your desired outcome, but don’t worry! That’s how it is supposed to look.
6. Remove The Excess Glaze
Once you have a complete layer of glaze on your cabinets, quickly wipe the cabinet with a clean rag in a circular motion. This will help remove the undesired excess glaze. When you are wiping, you’ll notice that the glaze comes off the face of the cabinets but sticks into the corners and surface details. You’ll want to continue wiping until you are pleased with the finished look. Continue with the remainder of the doors, drawers, and cupboard framing.
If you do not like how your glaze has come out, use paint thinner to wipe off all of the glaze. You can then start the process over again.
7. Allow The Glaze to Dry Completely
Now it’s time to let the glaze dry, which typically takes 24 hours. It may take longer than that, depending on climate and humidity. It’s best to follow the manufacturer’s instructions. Once dry, you can add a coat of urethane, varnish, or lacquer to help prevent damage and prolong the glaze, but it is not required.
8. Rehang Cabinet Doors
Once everything is dry, go ahead and rehang your drawers and reinstall your hardware. Take a step back and admire your hard work because you have successfully completed glazing your cabinets!
Shop At The Top Kitchen Cabinet Retailers in New Jersey and Florida
If you want to add a unique touch to your kitchen or bathroom cabinets, Cabinets Direct USA provides all the necessary information to get the job done correctly. For more information on cabinet glazing, be sure to head over to our Learning Center and watch Episode 4: What is a Glaze. For additional design inspiration on how to update your cabinets, be sure to visit our idea gallery. If you decide to incorporate new countertops or your old cabinets aren’t refurbishable, we have 6 convenient showrooms around New Jersey and several locations in Florida, including showrooms in Palm Beach Gardens and Boca Raton. Contact us today to learn more!